Appearance
Chapter 4 - Adding Events To the Items Component
In this chapter we keep building our ItemsList.component.vue so we can handle when the user clicks on an item in the list.
ItemsList Component
Start by adding a function called handleClick . This function will handle a click on each of the li elements and will toggle the item.selected property from true to false or vice versa. It will also logs the item id and selected properties to the console for preliminary debugging:
html
// file: src/components/items/ItemsList.component.vue

<script setup lang="ts">
  // import a reference to our ItemInterace
  import type { ItemInterface } from '../../models/items/Item.interface'
  // expose a property called items with a default value of a blank array
  defineProps<{ items: ItemInterface[] }>()

  // item click handler
  const handleClick = (item: ItemInterface) => {
    item.selected = !item.selected
    console.log('handleItemClick', item.id, item.selected)
  }
</script>
...
And update the html by adding an @click[1] attribute to the li element, pointing to our handler handleClick and passing a reference to the item as the argument:
html
// file: src/components/items/ItemsList.component.vue

...

<div>
  <h3>Items:</h3>
  <ul>
    <li v-for="(item, index) in items"
        :key="item.id"
        @click="handleClick(item)">
      {{item.name}}
    </li>
  </ul>
</div>
Note the syntax we use in the @click attribute. We pass the item directly into the function. This is different from frameworks like React or Svelte where you have to either use an anonymous funciton or handle the MouseEvent as a parameter.
typescript
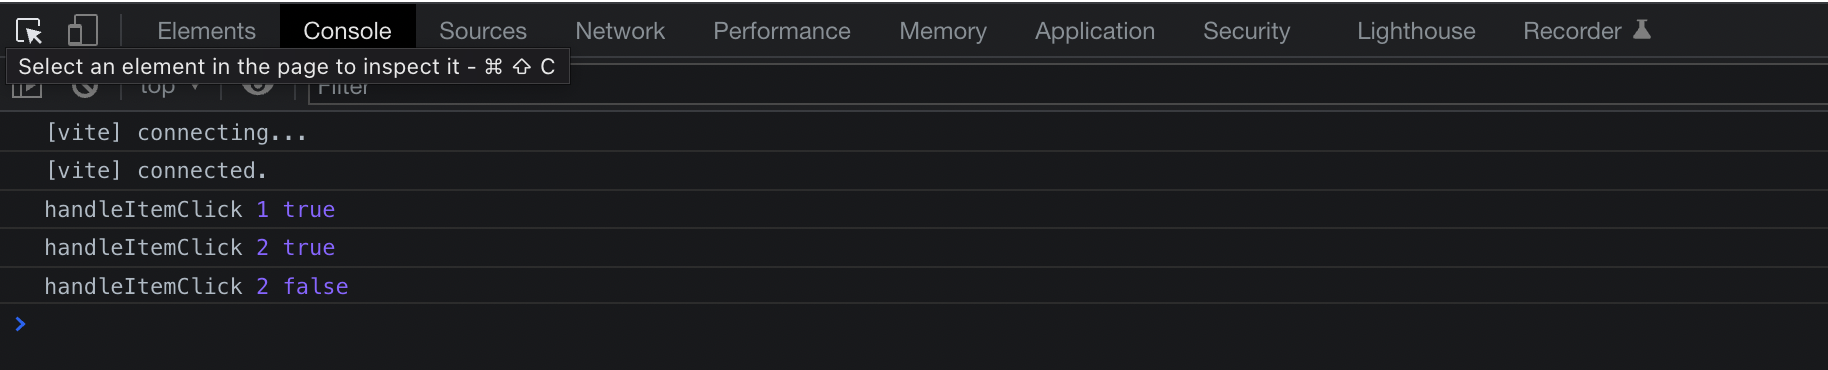
@click="handleClick(item)"Then, the web browser should have refreshed. Now, when clicking on the items in the list you should see the message being displayed in the browser console, and when clicking multiple times on the same item it should print true then false etc showing that toggling is working:
We just learned how to add a click handler to our component and changing the data item selected property that way. However, this in an anti-pattern in Vue as Vue follows a one-way data flow architecture where properties are only passed from parent to child components and can only be updated from the parent with reactive state (unless the reactive state is declared within the component itself).
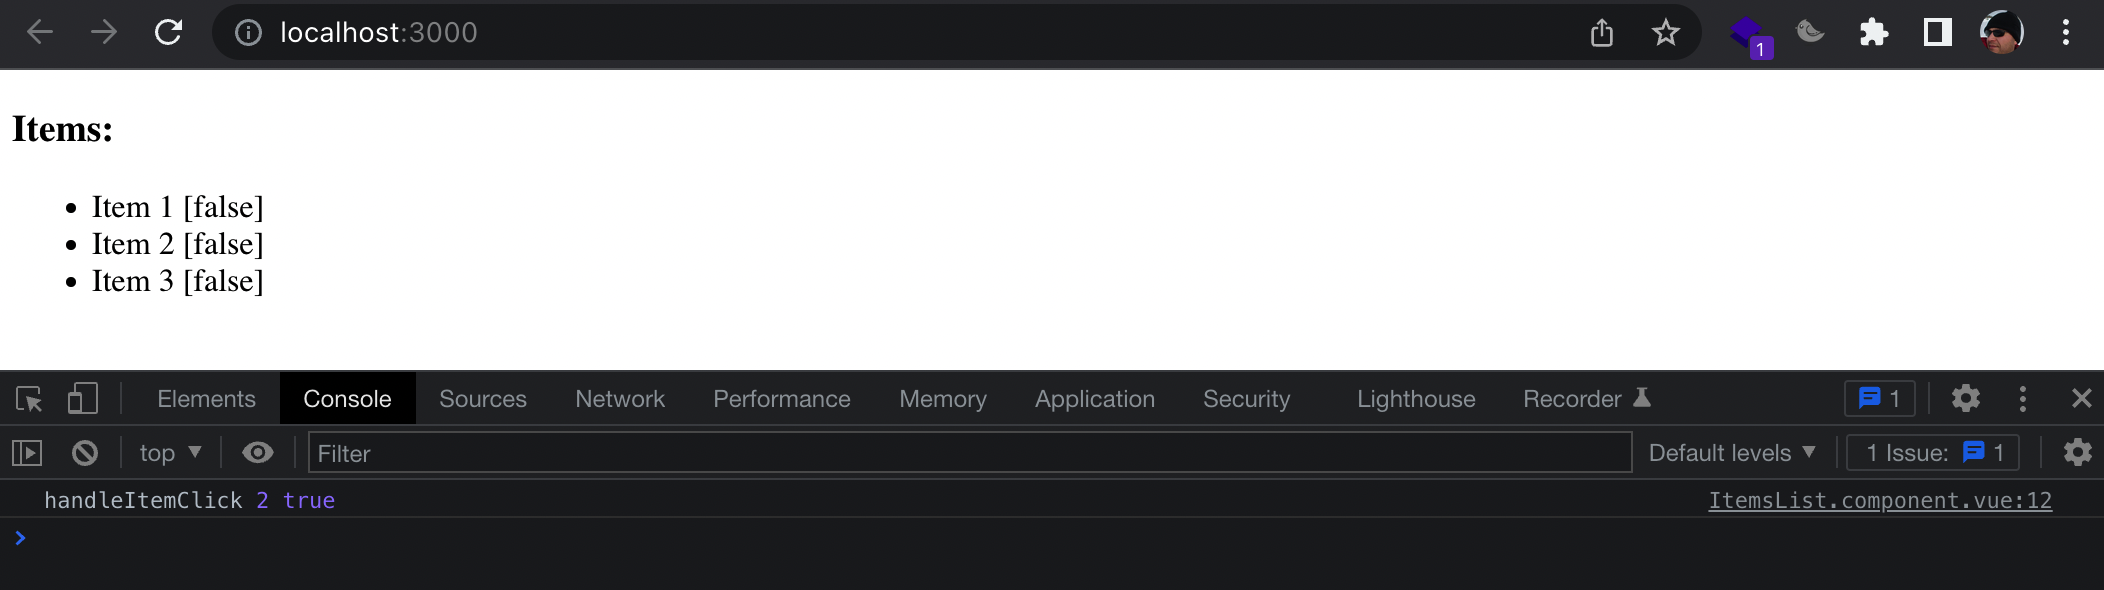
To verify this, start by slightly modifying the text output by our list element, outputting also the selected value within [] (square brackets) like:
html
<li v-for="(item, index) in items"
  :key="item.id"
  @click="handleClick(item)">
  {{item.name}} [{{item.selected}}] <!-- add this -->
</li>
Now the item.selected value will print next to the name and we can verify that Vue is not re-rendering the html when we click on each item, even though the console.log statement outputs the correct value:
Let's fix this.
Open the the ItemsList.component.vue file and add a defineEmits just after the defineProps line. There are 2 ways to defineEmits within "script setup":
- Just passing an array of strings with the name of each emit
- Using type-only declarations (with this you get all the power of TypeScript strong typing, so we'll use this)
Also modify the handleClick method to just emit the custom selectItem event by passing the id of the item as the argument:
vue
// file: src/components/items/ItemsList.component.vue
<script setup lang="ts">
  // import a reference to our ItemInterace
  import type { ItemInterface } from '../../models/items'

  // expose a property called items with a default value of a blank array
  defineProps<{ items: ItemInterface[] }>()

  // define emits for custom events
  // const emit = defineEmits(['selectItem']) // using only an array of strings
  const emit = defineEmits<{
    (e: 'selectItem', id: number): any // using type-only declaration
  }>()

  // item click handler
  const handleClick = (item: ItemInterface) => {
    emit('selectItem', item.id) // modify the body of the method by just emitting "itemClicked"
  }
</script>
Note: the name of the custom event does not have to be selectItem. If you prefer to follow a standard like onSelectItem to better identify that it is an event, feel free to do so)
Now open the App.vue file and let's make some changes in here too.
First, let's create a reactive state out of our items array:
vue
// file: App.vue
<script setup lang="ts">
  // import vue's reactive:
  import { reactive } from 'vue'

  ...

  // mock some data:
  const items = reactive([ // now items array will be reactive
    {
      id: 1,
      name: 'Item 1',
      selected: false // add selected: false to each item
    }, {
      id: 2,
      name: 'Item 2',
      selected: false
    }, {
      id: 3,
      name: 'Item 3',
      selected: false
    }
  ])

  ...

</script>
Then, just before the closing "script" tag, add an onSelectItem event handler, and wireup the @selectItem event on the ItemsListComponent to point at this:
vue
// file: App.vue
<script setup lang="ts">
  ...

  // add this block:
  // selectItem handler
  const onSelectItem = (id: number) => {
    // retrieve the item from our local data
    const item = items.find(o => o.id === id)
    // sanity check:
    if (!item) {
      console.warn(`onSelectItem: could not find item with id: ${ id }`)
      return
    }
    // update the item property
    item.selected = !item.selected
    console.log('onSelectItem', item.id, item.selected)
  }
</script>

<template>
  <div class="home">
    <ItemsListComponent :items="items" @selectItem="onSelectItem"/> <!-- wireup onSelectItem handler -->
  </div>
</template>
Note: in Vue we wire up handling event using the @ character like in @selectItem or @click etc.
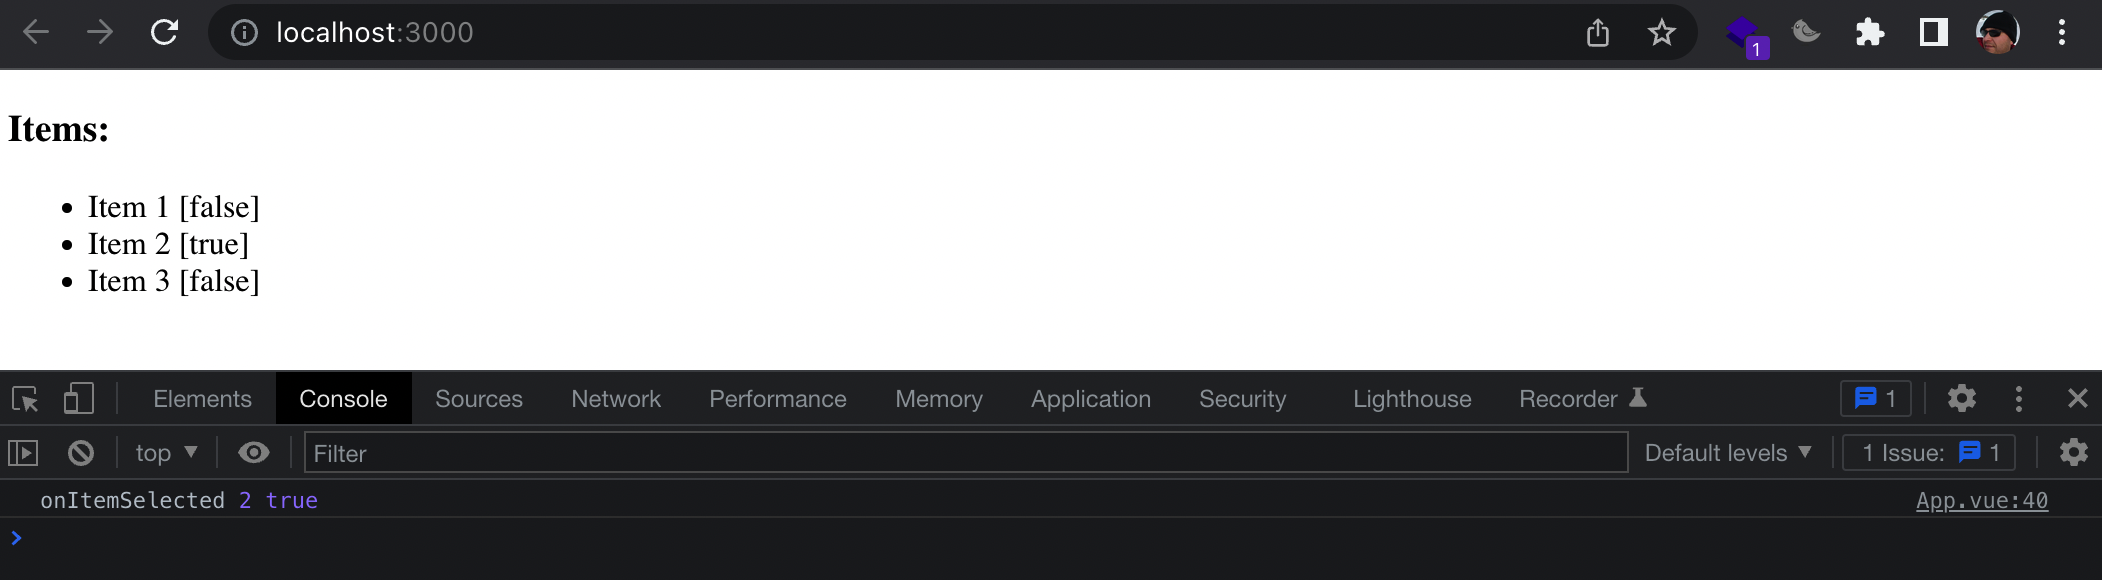
Save once more and check the browser again. This time you can verify the value of the selected property by looking at the output within the square brackets next to the name:
Note: I personally prefer to always declare a local reactive state by calling it state or internalState and use an object with properties for it. So in this case I would have declared const state = reactive({ items: [] }) so that items is a property of state. But you can follow an convention you prefer of course.
In the next chapter we'll talk more in depth on how to better manage the application state using centralized place and a State Manager
Chapter 4 Recap
What We Learned
- How to add a click handler to our ItemsList component
- How to define custom events within "script setup"
- How to use Vue's
reactiveto quickly create a local reactive state (items) - How to manipulate the item.selected property by emitting a custom event (@selectItem) and handling it in our parent component (App.vue)
Observations
- We need a more centralized way to handle changes on the data and state of the application
Based on these observations, there are a few improvements that we will make in the next chapters:
Improvements
- Implement a state manager to control our application state from a centralized place